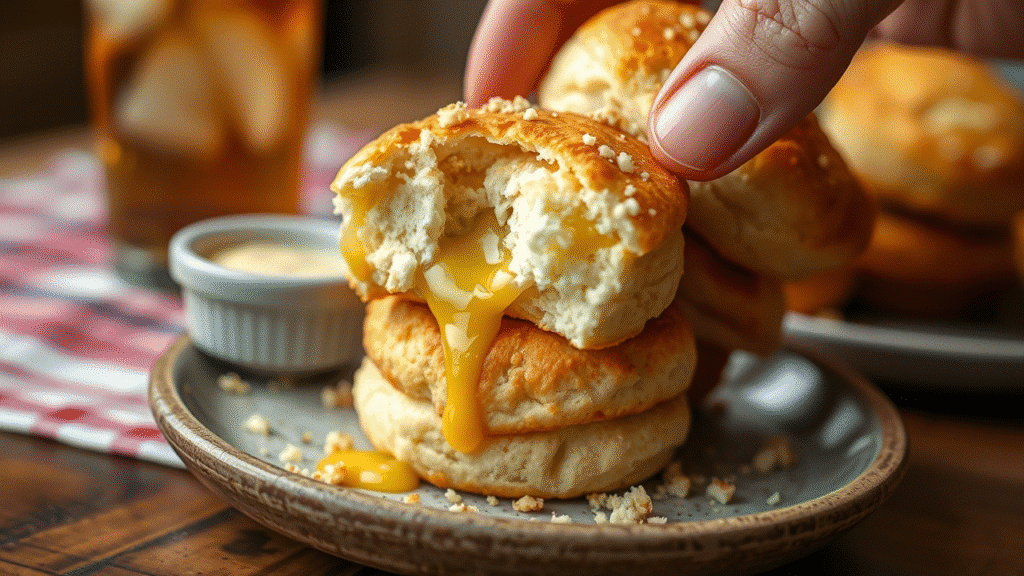
I’ll never forget the first time I watched a line cook at a busy Nashville restaurant turn a sleeve of Pillsbury biscuits into something that had customers asking for the recipe. He was moving fast during the dinner rush, but something about the way he was stuffing those biscuits with garlic butter made me stop and pay attention. That was my introduction to what would become one of the most requested appetizers in modern American comfort food.
Pillsbury Biscuit Garlic Butter Bombs represent the perfect marriage of convenience and indulgence. These aren’t just stuffed biscuits – they’re engineered flavor delivery systems that combine the flaky, buttery layers of refrigerated biscuit dough with an intensely savory garlic butter center that literally explodes with flavor when you bite into them. The technique transforms humble grocery store ingredients into restaurant-quality appetizers that rival anything coming out of high-end kitchens.
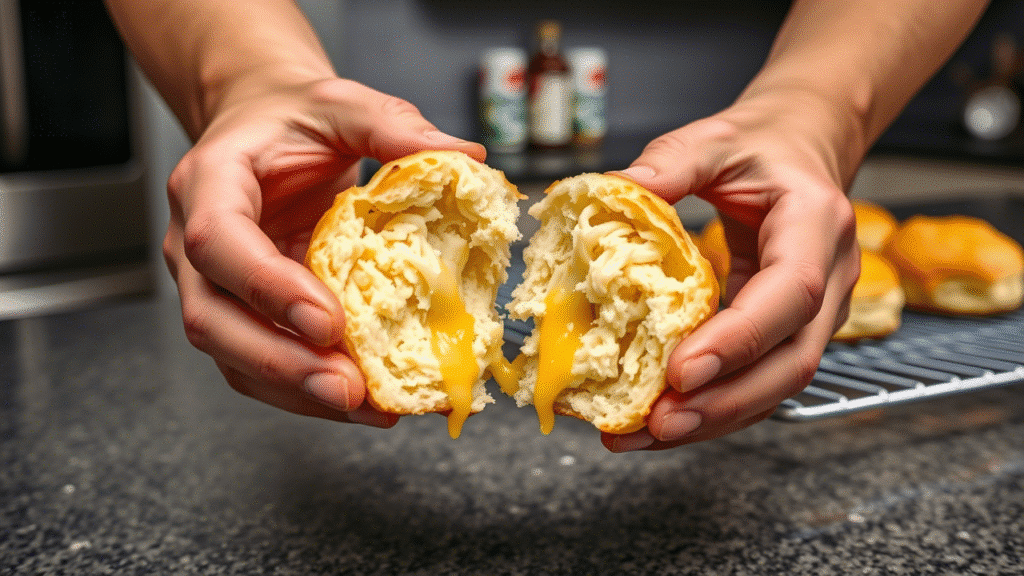
What makes this recipe particularly brilliant is how it leverages the existing structure of refrigerated biscuit dough. Instead of fighting against the dough’s natural tendency to separate into layers, we’re using that characteristic to create pockets for our garlic butter filling. The result is a perfectly contained flavor bomb that’s crispy on the outside, fluffy in the middle, and molten with garlic butter throughout.
The cooking method creates multiple textural elements in a single bite. The exterior develops a golden, crispy shell while the interior remains tender and flaky, with pockets of herb-infused garlic butter that melt into every layer of the biscuit.
Ingredients & Substitutions
For the Garlic Butter Base:
- 8 tablespoons unsalted butter, softened to room temperature
- 6 cloves garlic, microplaned or finely minced
- 2 tablespoons fresh parsley, finely chopped
- 1 tablespoon fresh chives, finely chopped
- 1 teaspoon dried Italian seasoning
- 1/2 teaspoon kosher salt
- 1/4 teaspoon freshly ground black pepper
- 1/4 teaspoon red pepper flakes (optional)
For the Biscuit Assembly:
- 2 tubes (16 biscuits total) Pillsbury Grands! Flaky Layers Original biscuits
- 1 cup sharp cheddar cheese, finely shredded
- 1/2 cup Parmesan cheese, freshly grated
For the Finishing Touches:
- 3 tablespoons melted butter
- 1 tablespoon fresh parsley, chopped
- 1/2 teaspoon garlic powder
- Flaky sea salt for sprinkling
The butter quality makes a significant difference in the final product. European-style butter with higher fat content creates richer flavor and better texture than standard American butter. If you can’t find European butter, Land O’Lakes or Kerrygold work excellently. The butter must be softened to room temperature for proper incorporation with the other ingredients.
Fresh garlic is absolutely essential here – pre-minced garlic from a jar lacks the pungency and complexity that makes these bombs special. Microplaning the garlic creates a smoother paste that distributes more evenly throughout the butter mixture. If you don’t have a microplane, mince the garlic as finely as possible and then mash it with the flat side of your knife with a pinch of salt.
The herb combination provides complexity beyond basic garlic butter. Fresh parsley adds brightness and color, while chives contribute a mild onion flavor that complements the garlic. If fresh herbs aren’t available, use 1 tablespoon dried parsley and 1/2 tablespoon dried chives, but the flavor will be less vibrant.
For the biscuits, Pillsbury Grands! Flaky Layers are crucial to the technique. Regular biscuits don’t have the same layer structure that allows for proper stuffing. The flaky layers version creates natural pockets that hold the garlic butter filling without breaking apart. Generic brands can work, but Pillsbury’s formulation provides the most consistent results.
Sharp cheddar cheese adds richness and helps bind the filling, while Parmesan provides umami depth and helps create a golden crust. Pre-shredded cheese works fine, but freshly shredded cheese melts more smoothly and has better flavor. For dairy-free versions, use vegan butter and nutritional yeast instead of cheese, though the texture will be different.
Step-by-Step Instructions

Creating the Perfect Garlic Butter
Start by ensuring your butter is properly softened – it should yield to light pressure but not be melted or greasy. In a medium bowl, combine the softened butter with the microplaned garlic. The key here is thorough incorporation; you want the garlic evenly distributed throughout the butter to prevent hot spots of intense garlic flavor.
Add the fresh herbs, Italian seasoning, salt, pepper, and red pepper flakes if using. Mix everything together with a fork or small whisk until the mixture is smooth and uniform in color. This garlic butter can be made up to 24 hours ahead and refrigerated, but bring it back to room temperature before using.
Preparing the Biscuit Dough
Preheat your oven to 375°F. Remove the biscuits from the refrigerator about 10 minutes before working with them – slightly warmed dough is easier to manipulate without tearing. Separate the biscuits and place them on a clean work surface.
Here’s where the technique becomes crucial. Gently press each biscuit to flatten it slightly, creating a shallow well in the center. Don’t roll them out completely – you want to maintain some of the original thickness while creating space for the filling. The flaky layers should remain visible around the edges.
Stuffing and Sealing the Bombs
Place about 1 tablespoon of the garlic butter mixture in the center of each flattened biscuit. Add a generous pinch of shredded cheddar and a smaller amount of Parmesan cheese on top of the garlic butter. The cheese helps bind the filling and prevents it from leaking out during baking.
Now comes the critical sealing step. Gather the edges of the biscuit dough up and around the filling, pinching them together firmly at the top. You want to create a sealed pouch with no gaps where the filling can escape. Place each bomb seam-side down on a parchment-lined baking sheet, ensuring they’re spaced about 2 inches apart.
The Baking Process
Brush the tops of each bomb with melted butter – this promotes browning and adds an extra layer of richness. Sprinkle with the remaining Parmesan cheese and a light dusting of garlic powder. The cheese will create a golden, crispy topping that contrasts beautifully with the tender biscuit interior.
Bake for 15-18 minutes, until the bombs are golden brown and sound hollow when tapped lightly. The internal temperature should reach 190°F if you want to be precise. Don’t overbake them – they’ll continue cooking slightly from residual heat after removal from the oven.
Finishing Touches
Immediately after removing from the oven, brush the hot bombs with any remaining melted butter and sprinkle with fresh parsley and flaky sea salt. The salt adds a textural contrast and enhances all the other flavors. Serve immediately while the garlic butter is still molten inside.
Cooking Techniques & Science
The success of garlic butter bombs relies on understanding how refrigerated biscuit dough behaves under heat. These biscuits contain layers of fat (shortening or butter) that create steam pockets when heated, resulting in the characteristic flaky texture. By stuffing the dough before baking, we’re creating additional steam from the melting butter filling, which helps create even more layers and fluffiness.
The sealing technique is critical because it creates a pressure vessel that traps steam and melted butter inside. When done correctly, the bombs puff up during baking as steam builds inside, creating the “explosion” effect when bitten into. Poor sealing results in leaking filling and dense, greasy bombs instead of light, fluffy ones.
Temperature control matters enormously here. The oven temperature of 375°F is hot enough to create immediate steam and set the exterior quickly, but not so hot that the outside burns before the interior cooks through. Higher temperatures can cause the dough to brown too quickly while leaving the center undercooked.
The garlic butter temperature is equally important. Room temperature butter spreads evenly and doesn’t shock the dough, while cold butter can create hard spots that don’t melt properly. Melted butter, on the other hand, can soak into the dough and make it soggy rather than creating the desired molten center.
The cheese serves multiple purposes beyond flavor. It helps bind the garlic butter mixture, prevents excessive leaking, and creates additional richness. The proteins in cheese also help create the golden-brown color through the Maillard reaction.
Serving & Pairing Suggestions

These garlic butter bombs are best served immediately while the centers are still molten. Present them on a rustic wooden board or in a cloth-lined basket to emphasize their homestyle appeal. The contrast between the golden-brown exterior and the herb-flecked interior makes for beautiful presentation.
For dipping options, consider marinara sauce, ranch dressing, or even a simple garlic aioli. The bombs are rich enough to stand alone, but the acid in marinara helps cut through the butter richness. A small bowl of grated Parmesan cheese for additional sprinkling lets guests customize their experience.
These work excellently as appetizers before Italian-American meals, alongside soups and salads, or as a side dish with grilled meats. They’re substantial enough to serve as a light lunch with a green salad, or as part of a larger spread for casual entertaining.
For beverages, they pair beautifully with crisp white wines like Pinot Grigio or Sauvignon Blanc, which provide acidity to balance the richness. Beer lovers should consider light lagers or wheat beers that won’t compete with the garlic flavors. Even a simple sparkling water with lemon helps cleanse the palate between bites.
The bombs also work well as part of a larger appetizer spread, alongside items like bruschetta, cheese boards, or charcuterie. Their handheld format makes them perfect for cocktail parties or casual gatherings where guests are standing and mingling.
Creative Variations
For a more sophisticated version, try adding sun-dried tomatoes and fresh basil to the garlic butter mixture. The tomatoes add sweetness and acidity that complements the garlic, while basil provides aromatic complexity. Finely chopped sun-dried tomatoes work best to prevent tearing the dough.
Bacon lovers can add crispy bacon bits to the filling, creating what’s essentially a loaded baked potato in biscuit form. Cook the bacon until very crispy, then crumble it finely to prevent large pieces from puncturing the dough. A small amount of cream cheese mixed into the garlic butter helps bind everything together.
For those who enjoy heat, diced jalapeños or a small amount of sriracha mixed into the garlic butter creates spicy bombs that pack a punch. Fresh jalapeños provide texture and bright heat, while sriracha adds depth and sweetness along with the spice.
Mediterranean variations might include feta cheese, kalamata olives, and oregano in place of the cheddar and Italian seasoning. The briny flavors work beautifully with the garlic base while creating an entirely different flavor profile.
Conclusion
Pillsbury Biscuit Garlic Butter Bombs succeed because they transform simple, accessible ingredients into something that feels special and indulgent. The technique is approachable enough for home cooks while sophisticated enough to impress guests, and the results are consistently crowd-pleasing.
The key to mastering this recipe lies in understanding the balance between convenience and technique. While we’re starting with store-bought biscuit dough, the way we handle, stuff, and bake them determines whether the result is merely good or truly exceptional. Proper sealing, temperature control, and timing create bombs that are crispy outside, fluffy inside, and molten with garlic butter throughout.

