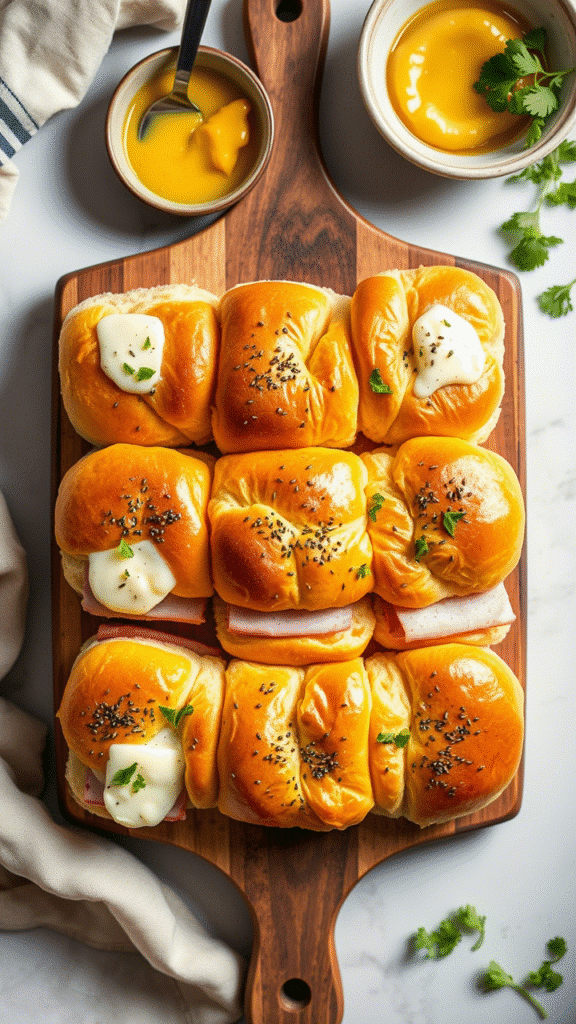
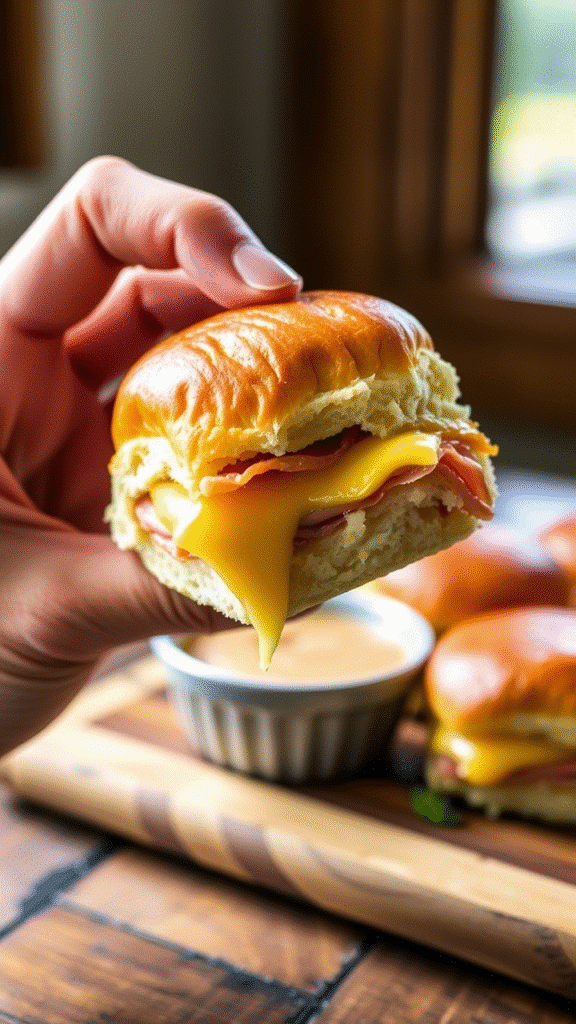
Let me tell you a little secret. The best thing I ever served at a party wasn’t some fancy sous vide duck breast or a meticulously layered mille-feuille. It was a tray of gooey, golden ham and cheese sliders those buttery little bombs disappeared faster than you can say “cheddar.” I was stunned. Grown adults licking their fingers, fighting over the last one. So yeah, don’t underestimate a good slider.
This easy ham and cheese sliders recipe is your weeknight savior, your party power move, your best friend on game day. They’re melty in the middle, buttery on the outside, with a crispy edge that’ll make your toes curl. You bake the whole thing together, slice ‘em up, and they just vanish.
Why are they special? Two things: the technique, and the balance of flavor. We use Hawaiian rolls (sweet, soft, impossible not to love), a double cheese hit (sharp + gooey), and a tangy mustard-butter glaze that caramelizes into a golden crust. This isn’t just a sandwich. It’s a whole experience.
Ingredients & Substitutions

Here’s what you need—and what you can swap if you need to go rogue.
- 1 package (12-count) Hawaiian sweet rolls
These are king. The sweetness plays beautifully with the salty ham. But if you’re stuck, any soft dinner roll works. Just steer clear of crusty bread—it messes with the texture. - 1/2 pound deli ham, thinly sliced
Smoked ham gives depth, honey ham brings sweetness. Black Forest is a nice middle ground. You want it shaved or at least thin—layers are the magic. - 6–8 slices of Swiss cheese
It melts like a dream and its nutty bite stands up to the ham. Can’t find Swiss? Provolone, Havarti, or even white cheddar will do the trick. - 1/4 cup unsalted butter, melted
This is your glaze base. Salted butter is fine too—just pull back a pinch on the added salt. - 1 tbsp Dijon mustard
Classic. It cuts through the richness. Yellow mustard works if that’s what you’ve got, but Dijon adds grown-up complexity. - 1 tbsp mayonnaise (optional, but worth it)
Spread on the inside for moisture and creaminess. You don’t need much. - 1 tsp Worcestershire sauce
Adds that deep, savory umami. Don’t skip it unless you really must. - 1/2 tsp garlic powder
Rounds out the glaze. Fresh garlic is too strong for this—trust the powder. - Poppy seeds, optional, for topping
For texture and a bit of visual flair. They look cool, taste nutty. Not essential, but they make it pop.
Wanna go low-carb? Use low-carb rolls or butter lettuce cups. Dairy-free? Try a vegan cheese that actually melts (good luck, but they’re getting better). Gluten-free? Soft GF rolls work okay, though you might need to adjust bake time.
Step-by-Step Instructions
1. Preheat and prep your pan.
Crank your oven to 350°F (175°C). Line a 9×13-inch baking dish with parchment or foil for easy cleanup. Trust me, this gets gooey.
2. Slice the rolls all at once.
Use a serrated knife to slice the whole slab of rolls horizontally, like a giant sandwich bun. Keep the bottoms together, same for the tops. It’s faster, neater, and lets you layer evenly.
3. Layer up: bottom buns, mayo, ham, cheese, top buns.
If using mayo, spread a thin layer on the cut side of the bottom. Lay on your ham—don’t just slap it down, fold or bunch it for texture. Then the cheese. Then the top layer of buns.
4. Make the glaze.
Mix melted butter, Dijon, Worcestershire, garlic powder, and a tiny pinch of salt in a bowl. Stir until emulsified. Pour or brush it evenly over the tops. Let it drip down the sides. That’s the money zone.
5. Let it soak for 10 minutes.
Just let the butter soak in a bit. If you skip this, they won’t get that caramelized crunch.
6. Bake uncovered for 18–22 minutes.
You’re looking for golden tops and melted cheese. If they’re browning too fast, tent loosely with foil at the 15-minute mark.
7. Rest and slice.
Let them sit for 5 minutes before slicing. This helps the cheese set slightly so it doesn’t ooze everywhere (unless you’re into that, which is fair).
Variations:
- Spicy: Add sliced pickled jalapeños between ham and cheese.
- Breakfast-y: Swap ham for scrambled eggs and bacon, cheddar for Swiss.
- Italian: Use salami + provolone, glaze with a little pesto butter.
Cooking Techniques & Science
Let’s nerd out for a sec.
The steam trap method: By baking the sliders as a unit, you trap steam. This keeps the inside moist while the butter-soaked tops crisp up. Kinda like how bao buns stay fluffy while the bottoms get golden in a pan.
Dijon in the glaze isn’t just flavor—it’s function. Mustard emulsifies the butter mixture and helps it cling to the buns. Skipping it? Your glaze will pool and the tops won’t caramelize as well.
The cheese barrier: Cheese goes on top of the ham, not under. Why? It melts downward and acts as glue to hold the sliders together. Put it under and you risk soggy bottoms.
A good serrated knife is key. Not just for slicing the rolls, but for cutting the sliders cleanly post-bake. A regular knife will smush and drag. Serrated cuts through clean, like a laser.
Tool talk:
- Pastry brush makes the butter glaze go on smooth and even.
- Baking dish with a bit of edge keeps the sliders from sliding apart.
- Parchment saves you from the dreaded cheese-crust cleanup nightmare.
Serving & Pairing Suggestions

These are hot, melty, and rich—so you’ll want contrast.
Serve with a crisp, vinegary slaw to cut through the fat. Something with shredded cabbage, a little carrot, and a mustardy vinaigrette works beautifully.
Pickles—always a win. Bread and butter or dill, doesn’t matter. Their acidity balances the richness.
Potato chips or oven fries on the side for crunch. If you’re going full comfort mode, load up.
Drinks?
- For kids or teetotalers: cold root beer or a tart lemonade.
- For adults: light beer, a citrusy IPA, or even a dry sparkling wine. Bubbles + fat = magic.
For parties, serve on a big wooden board. Garnish with herbs for color (rosemary sprigs look great). Add a little ramekin of grainy mustard on the side—watch people dip with glee.
Conclusion
Ham and cheese sliders might seem basic—but when done right, they hit like culinary dynamite. You get soft and crunchy, sweet and salty, creamy and sharp—all in one handheld bite. The key? Layering with care, balancing flavors, and that glorious glaze.
If you’re prepping for a crowd, this recipe scales like a dream. Make two trays, or three. They reheat well (wrap in foil, low oven). And leftovers? They don’t exist. Just don’t forget the napkins.
One last pro tip: Make a batch, eat one, and immediately freeze the rest pre-bake. You now have emergency sliders in your arsenal. You’re welcome.
FAQs
1. Can I make ham and cheese sliders ahead of time?
Yes! Assemble them fully, cover, and refrigerate for up to 24 hours. Bake straight from the fridge but add 5 minutes to the time.
2. What’s the best cheese besides Swiss?
Try Havarti for creaminess, sharp cheddar for punch, or pepper jack for a kick. Just make sure it melts well.
3. Can I use regular sandwich rolls?
You can, but Hawaiian rolls really shine here. Their sweetness balances the salty ham perfectly.
4. How do I store leftovers?
Wrap tightly in foil and store in the fridge up to 3 days. Reheat in a 300°F oven, wrapped, for 10–12 minutes.
5. Can I make this vegetarian?
Absolutely. Use sautéed mushrooms, caramelized onions, or thinly sliced roasted veggies with cheese. Add a pinch of smoked paprika to bring that “meaty” depth.

