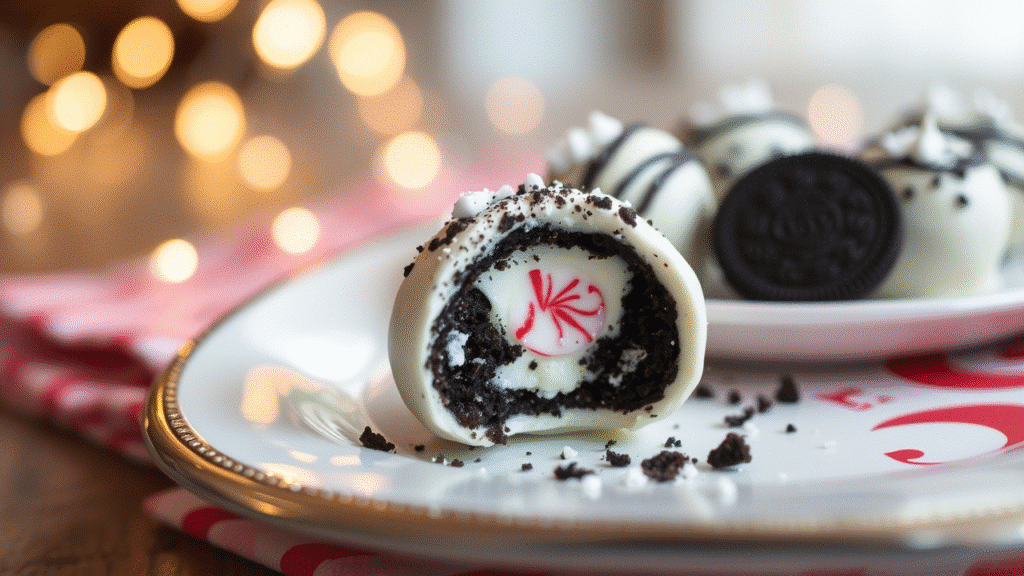
You ever had a dessert that tastes like pure Christmas joy wrapped in chocolate? I swear, the first time I bit into one of these no-bake peppermint Oreo truffles, it was like standing under a snowfall of candy canes while wrapped in a warm blanket. I was in my aunt’s kitchen, back in ’09, and she handed me this little cocoa-dusted ball that looked like nothing special. But then boom—a creamy, minty crunch that was so good it almost made me cry a little. Almost.
These truffles are stupidly easy to make, but don’t let that fool ya they’re fancy enough for a dessert tray at a black-tie holiday party and casual enough to devour while watching “Home Alone” in pajamas. No baking, no tempering, no thermometer nonsense. Just pure, fudgy magic rolled in crushed peppermint and dipped in chocolate. You’d think it came from a chocolatier’s workshop, not your kitchen.
The thing that makes these truffles truly special? It’s the combo of bold peppermint, dark crushed Oreos, and that smooth cream cheese filling that hugs the flavors together like they’re long-lost friends. You don’t need to be a pastry chef to pull these off, but you will look like one when you bring them out.
Ingredients & Substitutions
Alright, let’s break down the essentials. This isn’t a long list, but each item matters.
- 36 Oreo cookies (classic, NOT double-stuf)
You need that right ratio of cookie to cream. Double-stuf makes the filling too soft. - 8 oz (1 brick) full-fat cream cheese, softened
Skip the low-fat stuff. It doesn’t bind well and the flavor falls flat. - 1 tsp pure peppermint extract
Not mint extract. Big diff. Mint tastes like toothpaste. Peppermint tastes like the holidays. - 2 cups semi-sweet or dark chocolate chips (for coating)
You can use white chocolate if you want something fancier or more dramatic. Just melt slow, it burns quick. - 1 tbsp coconut oil (optional)
Makes the chocolate coating smoother and a bit shinier. Not mandatory, but chefs notice the sheen. - Crushed candy canes or peppermint candies (for garnish)
Adds texture and that iconic festive crunch.
Substitutions:
- Gluten-free Oreos work fine here, for those who need it.
- Vegan cream cheese and dairy-free chocolate = fully vegan version. Be sure to taste your filling as some plant-based cheeses can be saltier.
- If you hate peppermint (which, wow okay), just omit the extract and topping. You’ve got straight Oreo truffles.
Pro tip? Always taste your filling before rolling. Just a lil’ spoonful. It tells you everything.
Step-by-Step Instructions

Let’s get down to business. Get your hands a lil’ messy it’s worth it.
1. Crush the Oreos
Toss your cookies into a food processor and blitz until they’re fine crumbs. You want them looking like rich, black sand. No chunks. No visible cream blobs.
No processor? Throw ’em in a zip-top bag and crush with a rolling pin. Therapy and baking in one.
2. Mix with Cream Cheese
In a large bowl, combine the Oreo crumbs and softened cream cheese. Add the peppermint extract. Now stir, stir, stir. At first it’ll look dry, but it’ll come together into a thick dough-like texture.
Use a spatula or clean hands (gloved if you’re being fancy). It should be firm but moldable, not sticky like frosting.
3. Chill the Mixture
Pop the bowl in the fridge for 30 mins. This makes rolling a breeze. If you skip this, you’ll be cursing when the mix sticks to everything like tar.
4. Roll into Balls
Scoop about a tablespoon of mixture and roll between your palms to form balls. Place them on a parchment-lined tray.
Try to keep them all the same size—helps with even chocolate coating. You can use a cookie scoop if you’re a perfectionist (or just lazy like me sometimes).
5. Freeze
Toss that tray in the freezer for 15–20 minutes. The colder they are, the easier they are to dip.
Mistake alert: Don’t skip this part. Warm truffles + hot melted chocolate = sad, melty mess.
6. Melt the Chocolate
Melt your chocolate chips with the coconut oil in a heatproof bowl over simmering water (double boiler style), or zap in the microwave in 30-second bursts. Stir until silky smooth.
If the chocolate’s too thick, add a splash of oil or a small nub of butter. Not milk—it’ll seize.
7. Dip & Decorate
Using a fork or candy dipper, dunk each ball in the melted chocolate. Tap off excess. Place back on the tray and immediately sprinkle with crushed candy canes.
Do it fast. Once that chocolate sets, the candy won’t stick.
8. Chill Again
Let them set in the fridge for at least 30 minutes. Once the chocolate is firm, you’re golden.
Cooking Techniques & Science
You might be thinking, why freeze before dipping? Temperature contrast, baby. It keeps the creamy center from melting into the hot chocolate coating.
The cream cheese in the filling emulsifies with the Oreo crumbs. It binds, smooths, and creates a truffle-like texture without needing a ganache.
As for the peppermint extract—use pure. Artificial extracts can be harsh and leave a chemical aftertaste. Same goes for the chocolate. Use baking-quality chips or real couverture chocolate if you want a shiny snap when you bite in.
Tempering isn’t necessary here, thanks to the coconut oil and the fact that these are served chilled. But if you want that professional look, tempering gives a clean break and zero bloom.
Serving & Pairing Suggestions

These truffles belong on a white plate dusted with extra candy cane powder. You could even drizzle some white chocolate overtop for that bakery-style finish.
They pair beautifully with:
- Hot chocolate (extra marshmallows)
- Peppermint lattes
- Mulled wine, for a grown-up twist
Or plop one on top of a scoop of vanilla ice cream. Not traditional, but who cares?
Package them in holiday tins with parchment paper for easy edible gifts. People go bananas over ‘em. I’ve seen coworkers hoard these in their cubicle drawers like they’re treasure.
Conclusion
No-bake peppermint Oreo truffles are proof you don’t need an oven to create something unforgettable. They’re rich, minty, indulgent little bites of winter joy. The recipe is forgiving, customizable, and way easier than it tastes.
Perfect for last-minute parties or lazy snow days, they’ll impress even the fussiest dessert snobs. Just don’t skip the chilling steps, and always use good chocolate. The devil’s in the details.
Try them once, and they’ll probably show up on your holiday dessert table every year after that. And that’s not a warning—it’s a promise.
FAQs
1. Can I make these truffles ahead of time?
Yes, absolutely. They keep for up to 2 weeks in the fridge or 2–3 months in the freezer. Just store in an airtight container.
2. What if I don’t have peppermint extract?
You can skip it or replace it with a drop of vanilla for a plain Oreo truffle. Or use a few drops of food-grade peppermint oil—just less of it, it’s stronger.
3. Why is my truffle mixture too sticky?
Probably too much cream cheese or warm ingredients. Chill the mix for 30 minutes and try again. It should be firm but pliable.
4. Can I use flavored Oreos?
Heck yeah. Try peppermint Oreos, chocolate cream Oreos, even peanut butter ones. Just reduce or skip the peppermint extract depending on flavor.
5. How do I keep the chocolate coating smooth and not lumpy?
Use a bit of oil (coconut or vegetable), melt slowly, and stir constantly. Don’t let water touch the chocolate—it’ll seize instantly.

