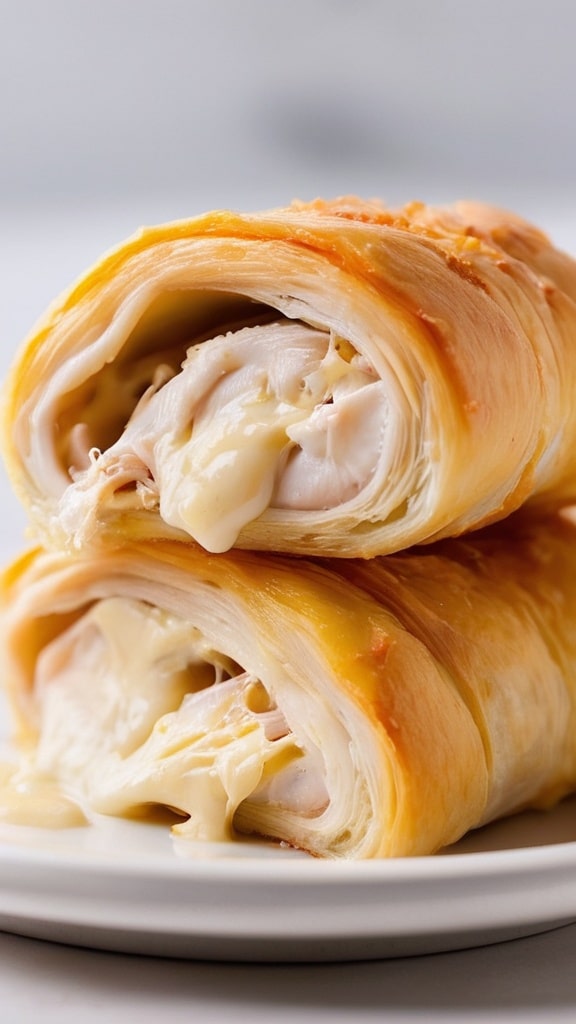
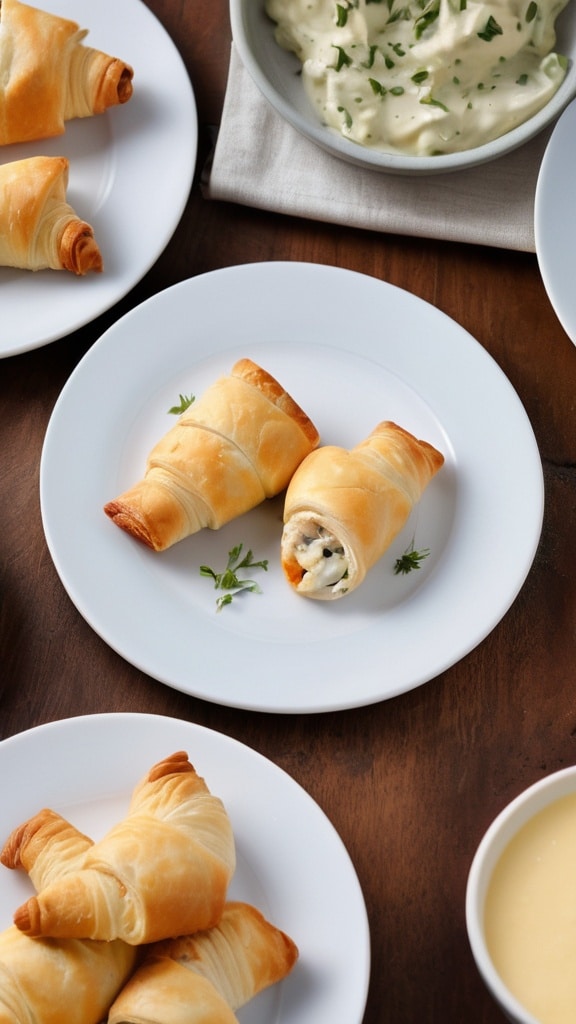
I still remember the first time I served these Cheesy Chicken Crescent Roll-Ups at a family gathering. My brother-in-law, typically reserved with compliments, actualy asked for the recipe. That’s when I knew this dish was something special – not just another weeknight dinner, but a genuine crowd-pleaser with surprising versatility and depth.
Cheesy Chicken Crescent Roll-Ups represent the perfect marriage of convenience and indulgence. They transform simple ingredients into a dish that feels simultaneously nostalgic and innovative. These golden-brown bundles feature tender chicken and gooey cheese wrapped in flaky crescent dough – creating that rare dish that appeals to sophisticated palates while still satisfying picky eaters.
The Magic Behind Crescent Roll-Ups
The brilliance of this recipe lies in its adaptability. I’ve made these countless times over the decades, and they’ve evolved alongside my culinary journey. What began as a quick solution for using leftover rotisserie chicken has become a canvas for creative flavor combinations and techniques.
Crescent roll dough serves as the foundation, but don’t be fooled by its humble origins. This refrigerated wonder provides a consistent, flaky texture that would take hours to achieve from scratch. The dough’s slightly sweet undertone creates an interestin counterpoint to the savory filling, while its structure holds everything together during baking.
Professional chefs might scoff at using pre-made dough, but I’ve learned that true culinary wisdom means knowing when convenience outweighs purism. These roll-ups exemplify smart cooking – maximum flavor impact with minimal kitchen stress.
Ingredients & Substitutions
For the Base Recipe:
- 2 cans (8 oz each) refrigerated crescent roll dough
- 2 cups cooked chicken, finely diced or shredded
- 8 oz cream cheese, softened
- 1 cup shredded cheddar cheese (medium or sharp)
- 1/4 cup finely chopped green onions
- 1/2 teaspoon garlic powder
- 1/2 teaspoon dried dill
- 1/4 teaspoon black pepper
- 1/4 cup melted butter
- Optional: 1/2 teaspoon crushed red pepper flakes for heat
The chicken selection matters significantly here. Rotisserie chicken provides exceptional flavor and moisture, but poached chicken breasts work beautifully for a lighter version. Dark meat lovers can substitute thighs for richer flavor and better moisture retention during baking.
For those avoiding dairy, vegan cream cheese and plant-based shredded cheese alternatives perform surprisingly well. The texture differs slightly, but modern plant-based cheeses have improved dramatically in melting properties. I’ve had guests unable to distinguish between traditional and dairy-free versions.
Gluten-sensitive? Several companies now make gluten-free crescent dough that performs remarkably similar to the original. The texture can be slightly less flaky, but the convenience remains intact.
Flavor Variations:

Mediterranean Inspired:
- Add 1/4 cup chopped sun-dried tomatoes
- Substitute feta for cheddar
- Add 2 tablespoons chopped kalamata olives
- Replace dill with 1 teaspoon dried oregano
Southwest Kick:
- Add 1/4 cup diced green chiles
- Substitute pepper jack for cheddar
- Add 1/2 teaspoon ground cumin
- Include 2 tablespoons chopped cilantro
- Serve with salsa for dipping
The quality of your cheese dramatically impacts the final result. Pre-shredded cheese contains anti-caking agents that can inhibit proper melting. When possible, purchase blocks and grate them fresh – the difference in creaminess is worth the extra effort.
Step-by-Step Instructions
Preparing the Filling
- Bring cream cheese to room temperature at least 30 minutes before beginning. Cold cream cheese creates lumpy filling that’s difficult to distribute evenly. If pressed for time, unwrap and microwave it for 15-20 seconds.
- In a medium bowl, combine softened cream cheese, shredded chicken, cheddar cheese, green onions, and seasonings. Mix thorougly until ingredients are evenly distributed. The filling should hold together when scooped but remain soft enough to spread.
Common mistake: overmixing can make the filling dense and paste-like. Use a folding motion rather than aggressive stirring to maintain texture.
- Taste and adjust seasoning before assembly. This is your last chance to correct flavor balance before the filling gets wrapped. Remember that the crescent dough adds sweetness, so the filling should be slightly more savory than you think necessary.
Assembly Process
- Preheat your oven to 375°F (190°C) and line a baking sheet with parchment paper. The parchment prevents sticking and makes cleanup effortless. Silicone mats work well too, but avoid foil as it can cause the bottoms to brown too quickly.
- Unroll crescent dough and separate into triangles along perforated lines. For extra-large roll-ups, press two triangles together to form a rectangle and seal the diagonal seam by pinching it together.
Pro tip: If the dough feels sticky, chill it for 5-10 minutes before handling. Room temperature dough becomes difficult to separate cleanly and may tear during stretching.
- Place approximately 2 tablespoons of filling near the wide end of each triangle. Too much filling leads to ruptures during baking; too little creates disappointing bites. The filling should cover about 1/3 of the triangle area.
- Roll up each crescent, starting with the wide end and tucking in any filling that tries to escape. Place on prepared baking sheet, leaving about 2 inches between each roll-up to allow for expansion.
- Brush the tops with melted butter and sprinkle with additional herbs or grated parmesan if desired. This step enhances browning and adds another layer of flavor complexity.
- Bake for 11-13 minutes until golden brown. The exact timing depends on your oven’s peculiarities. Look for deep golden edges and a firm (not doughy) center when touched gently.
Cooking Techniques & Science
The success of Cheesy Chicken Crescent Roll-Ups hinges on several key technical elements that separate mediocre attempts from showstoppers. Understanding these principles elevates your execution.
Temperature management is crucial throughout the process. The dough performs best when slightly chilled, while the filling ingredients should be room temperature to ensure proper binding and flavor distribution. This contrast creates the ideal scenario for clean assembly.
When baking, the butter in both the dough and brushed topping undergoes a transformation known as the Maillard reaction – a complex chemical process that creates hundreds of flavor compounds. This reaction occurs between 280°F and 330°F, explaining why proper oven preheating is non-negotiable.
The structure of crescent dough contains multiple layers of fat separated by thin layers of flour-based dough. During baking, the fat melts while simultaneously, the water in the dough creates steam. These processes together cause the dramatic puffing and flaking associated with quality results.
For advanced preparation, these roll-ups can be assembled up to 8 hours ahead and refrigerated before baking. This actually improves the final texture as the filling firms slightly, reducing the chance of leakage. However, brush with butter just before baking rather than in advance.
If you’re feeling ambitious, try making homemade crescent dough. While commercial versions are excellent, scratch-made dough incorporates European-style butter with higher fat content, creating exceptional flakiness. The trade-off? Approximately three additional hours of preparation.
Serving & Pairing Suggestions

These versatile roll-ups transition seamlessly between casual weeknight dinners and elegant entertaining. Presentation can be adjusted accordingly.
For family-style service, arrange roll-ups in a spiral pattern on a round platter with a small bowl of dipping sauce in the center. A simple sauce of equal parts sour cream and Dijon mustard creates a tangy complement to the rich filling.
When entertaining, consider slicing baked roll-ups in half diagonally and arranging them on a tiered platter interspersed with fresh herb sprigs. This presentation elevates them to proper hors d’oeuvres status.
Side dish pairings depend largely on how you’re positioning the roll-ups within your meal structure. As a main course, they pair beautifully with:
- Roasted asparagus with lemon zest
- Wild rice pilaf with dried cranberries
- Simple green salad with vinaigrette (the acidity cuts through the richness)
For wine pairing, I recommend a medium-bodied white with good acidity like an unoaked Chardonnay or Pinot Gris. If you prefer red, try a light Pinot Noir. The goal is complementing rather than competing with the flavors.
Make-ahead options add convenience without compromising quality. Fully baked roll-ups reheat remarkably well in a 325°F oven for 10 minutes. For optimal results, cover loosely with foil for the first 7 minutes, then uncover to restore crispness.
Beyond the Basics: Advanced Techniques
After mastering the standard recipe, consider these professional refinements:
Create a compound butter for brushing by mixing melted butter with finely chopped herbs, microplaned garlic, or citrus zest. This adds aromatic complexity to the exterior.
For picture-perfect presentation, chill the filled and rolled crescents for 15 minutes before baking. This firms the dough and helps maintain the classic crescent shape during baking.
Experiment with filling temperatures. While room temperature filling is standard, slightly chilled filling helps maintain distinct pockets of cheese rather than a completely homogenized interior.
Consider the cutting technique when preparing chicken. Shredding creates a different texture than dicing. Shredded chicken distributes more evenly but can sometimes result in stringy texture. Fine dicing creates more distinct chicken pieces and better moisture retention.
Conclusion
Cheesy Chicken Crescent Roll-Ups represent that rare culinary achievement – a dish that satisfies on multiple levels. They offer the nostalgia of comfort food while remaining sophisticated enough for entertaining. They embrace convenience without sacrificing flavor. They’re approachable for beginners yet offer enough nuance to interest experienced cooks.
I’ve prepared these countless times over the years, and they continue to evolve alongside my culinary journey. The fundamental charm remains consistent: that moment when the fork breaks through the flaky exterior to reveal the creamy, savory filling within. It’s an experience that transcends the sum of its parts.
Whether you’re preparing a quick family dinner or expanding your entertaining repertoire, these roll-ups deserve a place in your cooking rotation. They remind us that sometimes the most memorable dishes aren’t the most complicated they’re the ones that bring people together around the table, eager for just one more bite.
FAQs
Can I freeze Cheesy Chicken Crescent Roll-Ups?
Absolutely! For best results, freeze them unbaked on a parchment-lined sheet until solid, then transfer to freezer bags. Bake directly from frozen, adding 5-7 minutes to the baking time. The texture differs slightly from fresh-baked but remains delicious.
Why did my roll-ups leak filling during baking?
Leakage typically happens for three reasons: overfilling, improper sealing, or thin spots in the dough. Try using slightly less filling, pinching seams more firmly, and handling the dough gently to prevent stretching thin areas.
Can I prepare the filling a day ahead?
Yes, the filling actually benefits from overnight refrigeration as flavors meld beautifully. Just bring it back to room temperature before assembly so it’s spreadable. Cold filling is difficult to work with and can tear the dough.
How do I prevent the bottoms from getting soggy?
Two techniques help: 1) Use a preheated baking sheet – place it in the oven during preheating, then carefully transfer prepared roll-ups onto it. 2) Consider using a pizza stone, which conducts heat effectively and absorbs moisture.
Can I make mini versions for appetizers?
Definitely! Cut each triangle of dough in half to create smaller triangles. Use about 1 teaspoon of filling per piece. Reduce baking time to 8-10 minutes and watch carefully to prevent over-browning.

