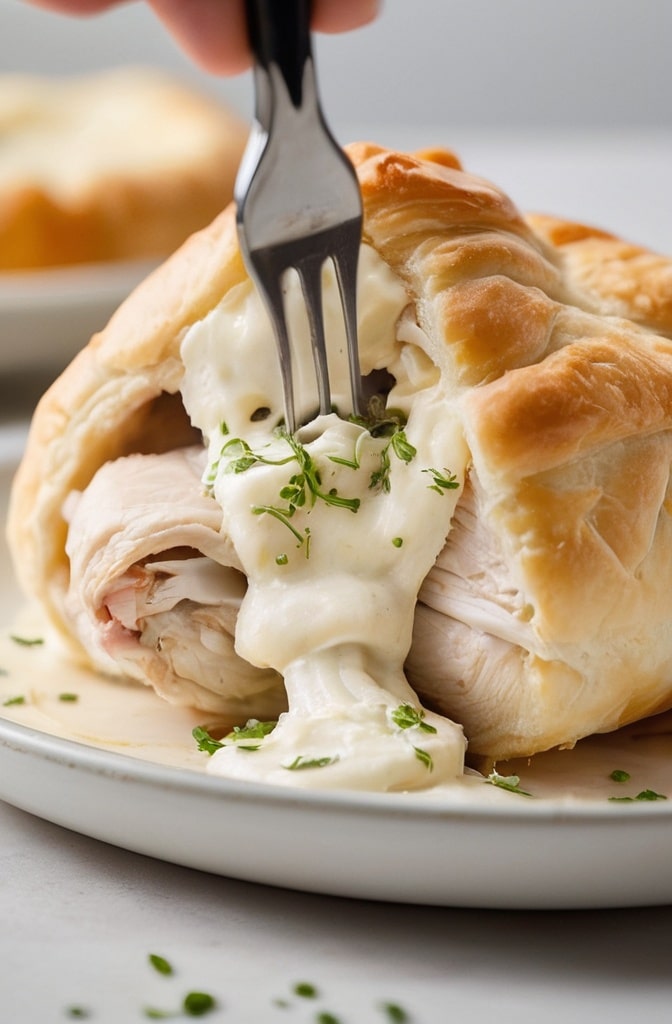
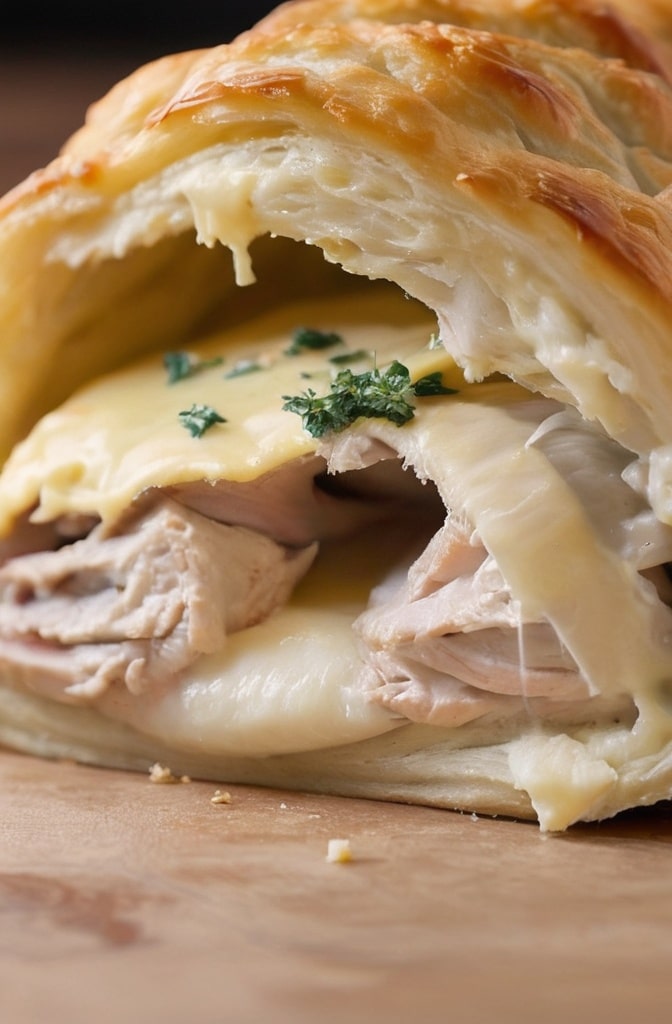
I still remember the first time I tucked into a properly made chicken bundle. It was at my aunt Marge’s house during a bitter Michigan winter, steam rising from the golden, flaky pastry as I cut into it. The way the creamy filling oozed out, mingling with that buttery crescent dough it was a revelation that’s stuck with me through culinary school and beyond.
These ain’t your average weeknight dinner. Crescent roll chicken bundles occupy that perfect sweet spot between impressive enough for company and simple enough for a Tuesday night when you’re craving somthing special. They’ve been gracing American dinner tables since the 1970s when refrigerated crescent roll dough became a pantry staple, but the technique draws from much older culinary traditions.
What makes these bundles so darn special is their versatility. The basic concept a creamy chicken filling wrapped in flaky pastry—provides endless opportunities for customization. You can dress them up with gourmet ingredients for a dinner party or keep them simple for family comfort food. Let’s dive into creating this culinary classic with some professional insights that’ll elevate your bundles from good to unforgettable.
Ingredients & Substitutions
For the Filling:
- 2 cups cooked chicken, shredded or diced
- 8 oz cream cheese, softened
- 2 tablespoons butter
- 1/4 cup finely chopped onion
- 1 clove garlic, minced
- 1/4 cup finely diced celery
- 1/4 cup finely diced carrot
- 1/2 teaspoon dried thyme
- 1/2 teaspoon dried rosemary
- Salt and freshly ground black pepper, to taste
- 2 tablespoons fresh parsley, chopped
For the Bundles:
- 2 cans (8 oz each) refrigerated crescent roll dough
- 1 egg, beaten (for egg wash)
- 1 tablespoon sesame or poppy seeds (optional)
The chicken choice matters more than you might think. Rotisserie chicken works brilliantly here—it’s convenient and brings a depth of flavor that plain poached chicken can’t match. However, poaching your own chicken in herb-infused broth will give you both tender meat and a flavorful liquid you can reduce for an accompanying sauce. Dark meat typically provides more moisture and flavor, but a mixture offers the best of both worlds.
For those avoiding dairy, plant-based cream cheese substitutes work suprisingly well, though they don’t melt quite the same. If you’re gluten-free, several companies now make gluten-free crescent roll alternatives, or you could use a gluten-free pie crust cut into squares. The texture will differ slightly, but the concept remains intact.
Fresh herbs will always outperform dried ones in this recipe. If ya have access to fresh thyme and rosemary, use about 1-1/2 teaspoons of each, finely chopped. The aromatics really sing with fresh herbs.
Step-by-Step Instructions

Preparing the Filling
- Melt butter in a medium skillet over medium heat. Add onions, celery, and carrots, cooking until softened but not browned, about 5-7 minutes. This “mirepoix” creates a foundation of flavor that elevates the entire dish beyond basic chicken and cream cheese.
- Add garlic and cook for another 30 seconds until fragrant. Be careful not to burn the garlic it’ll turn bitter and ruin the delicate flavor profile we’re building.
- Remove from heat and allow to cool for 5 minutes. Temperature control is crucial here; adding hot vegetables to cream cheese will cause it to break and become greasy.
In a large mixing bowl, combine softened cream cheese, cooled vegetables, shredded chicken, dried herbs, salt, and pepper. Mix thoroughly but gently—overworking will make the filling dense. The filling should be room temperature before assembly; a hot filling will melt the crescent dough and make it impossible to work with.
Common mistake: using cream cheese straight from the refrigerator. It must be properly softened to incorporate evenly with the other ingredients. Place it on the counter for at least 30 minutes before starting, or microwave in 10-second bursts, checking frequently.
Assembling the Bundles
- Preheat your oven to 375°F (190°C) and line a baking sheet with parchment paper. The parchment isn’t just for easy cleanup—it prevents the bottoms from burning before the tops are golden.
- Unroll crescent dough and separate into triangles. For larger bundles, press two triangles together along the perforated edge to form a rectangle. This gives you more surface area for filling.
- Place approximately 2-3 tablespoons of filling in the center of each piece of dough. Don’t overfill—it’s the most common mistake and leads to filling erupting during baking. Leave at least a 1/2-inch border around the edges.
Bring the corners of the dough up and over the filling, pinching the edges to seal completely. This is where technique comes in—the seal must be tight to prevent leakage. Use a fork to crimp the edges if you’re having trouble getting a good seal.
For a variation that’ll impress guests, try incorporating 1 tablespoon of pesto into the filling mixture or adding 1/4 cup of finely diced sun-dried tomatoes. For a cozier, more traditional flavor profile, add 1/4 teaspoon of poultry seasoning to the mixture.
Baking to Golden Perfection
- Brush each bundle with beaten egg wash. Don’t skip this step it’s what gives the bundles that professional-looking golden shine that makes people go “wow” when they come to the table.
- Sprinkle with sesame or poppy seeds if desired. These add a nice textural contrast and visual appeal.
- Bake for 15-18 minutes, or until deeply golden brown. The key here is oven position the middle rack ensures even baking. If your oven runs hot in certain spots, rotate the pan halfway through baking.
Let the bundles rest for 5 minutes before serving. This resting period allows the filling to set slightly and reduces the risk of burning your mouth on molten cream cheese. It also gives the flavors a chance to meld together more harmoniously.
Cooking Techniques & Science
The magic of these bundles happens at the interface between dough and filling. As the bundles bake, two critical processes occur simultaneously: the butter in the crescent dough creates steam pockets that cause the dough to puff and create layers, while the proteins in the egg wash coagulate to form that beautifully glazed exterior.
Temperature contrast is essential. Cold dough hitting a hot oven creates the rapid expansion needed for flakiness. This is why professional chefs often chill assembled pastries before baking. If you have time, place the assembled (but not egg-washed) bundles in the refrigerator for 15 minutes before brushing with egg and baking.
The mirepoix (onion, celery, carrot) isn’t just tradition these aromatics contain natural sugars that caramelize during the initial sauté, creating depth through the Maillard reaction. This chemical process transforms hundreds of flavor compounds and is the difference between bland and brilliant fillings.
A stand mixer with paddle attachment will incorporate filling ingredients without overworking them. If mixing by hand, use a folding motion rather than aggressive stirring. Overworked fillings become dense and lose their luxurious mouthfeel.
The shape of your bundle affects cooking time and texture. Traditional triangles create more corners which brown faster and provide textural contrast. Rectangle-shaped bundles hold more filling but require slightly longer baking for the center to cook through.
Serving & Pairing Suggestions

These bundles practically beg for a sauce. A simple dijon cream sauce (1 cup heavy cream, 2 tablespoons dijon mustard, salt and pepper) creates a restaurant-quality presentation. Ladle a small amount onto warmed plates and place the bundle atop the sauce.
For plating, think about color contrast. A vibrant side of roasted asparagus or glazed carrots provides visual appeal against the golden bundles. A sprinkle of microgreens or a small herb salad adds height and freshness.
These bundles pair beautifully with acidic components that cut through the richness. Consider serving with a bright arugula salad dressed with lemon vinaigrette or a side of quick-pickled red onions.
Wine pairings depend on your filling variations. The classic version calls for a medium-bodied white with some acidity—think Viognier or unoaked Chardonnay. If you’ve added herbs and lemon to your filling, a Sauvignon Blanc complements those brighter notes.
For a complete meal that’ll impress without overwhelming, serve the bundles alongside wild rice pilaf and haricots verts. This classic trio provides textural contrast and balanced nutrition while maintaining an elegant presentation.
Make-ahead tip: These bundles can be assembled up to 24 hours in advance and refrigerated, unbaked and uncovered. Simply brush with egg wash just before baking. They’ll need an extra 2-3 minutes in the oven if baking from chilled.
The Chef’s Secret Touches
What separates a good chicken bundle from a great one often comes down to tiny details. Try browning the butter before adding vegetables to create nutty, caramelized notes that transform the filling. This extra two minutes makes a world of difference.
Temperature control throughout the process is critical. Cold ingredients (except the cream cheese) keep the dough from becoming sticky and difficult to manage. Work efficiently and don’t let the dough sit at room temperature any longer than necessary.
Consider the textural elements. Adding a tablespoon of finely chopped water chestnuts provides subtle crunch without interfering with the filling’s creaminess. Similarly, toasted pine nuts can add both texture and flavor complexity.
Seasoning is where many home cooks falter. The filling should taste slightly more seasoned than you think necessary before baking the crescent dough will dilute the flavor. A pinch of white pepper rather than black gives warmth without visible specks.
Conclusion
Crescent roll chicken bundles represent the perfect marriage of convenience and culinary craft. They remind us that impressive cooking doesn’t always require obscure ingredients or complex techniques sometimes it’s about executing simple concepts with attention to detail and understanding of flavor.
The versatility of these bundles makes them endlessly adaptable to seasonal ingredients, dietary needs, and occasion. From casual family dinners to elegant dinner parties, they bridge the gap between comfort food and sophisticated cuisine.
What I love most about this recipe is how it welcomes personalization. Once you’ve mastered the basic technique, the filling becomes your canvas. Add diced apples and brie for a fall-inspired version, or incorporate pesto and sun-dried tomatoes for Mediterranean flair. The possibilities stretch as far as your imagination.
Remember, the key to truly exceptional bundles lies in respecting each component: properly seasoned filling, careful assembly, and attentive baking. Master these elements, and you’ll have a dish worthy of both weeknight dinners and special occasions—a true culinary workhorse that never disappoints.
FAQs
Can I freeze these chicken bundles?
Absolutely! Freeze them unbaked on a baking sheet until solid, then transfer to freezer bags. When ready to bake, don’t thaw—just add about 7-10 minutes to the baking time. The egg wash should be applied just before baking, not before freezing.
Why did my bundles leak during baking?
Two common culprits: overfilling or inadequate sealing. Make sure your filling is room temperature (not hot), use no more than 3 tablespoons per bundle, and really pinch those seams closed. A fork-crimping technique can help ensure a tight seal.
Can I make these with leftover turkey instead of chicken?
Turkey works beautifully as a substitute especially after Thanksgiving! The slightly stronger flavor of turkey pairs wonderfully with cranberry additions to the filling. Just ensure the turkey is well-moistened, as it tends to be drier than chicken.
How can I make these bundles look more professional?
For that bakery-quality finish, double up on the egg wash. Apply one coat, let it dry for 5 minutes, then apply a second coat before adding seeds. Also, a sprinkle of flaky sea salt on top just before baking adds both visual appeal and a flavor pop.
My crescent dough gets sticky and hard to work with. Help!
Keep everything cold! If your kitchen is warm, work with one can of dough at a time, keeping the second refrigerated. You can also chill your work surface by placing a baking sheet in the freezer for 10 minutes before rolling out the dough on it.

